Showing posts with label holidays. Show all posts

Monday, October 5, 2015

Book Review: Great Paper Quilling

Great Paper Quilling by Mickey Baskett.  Published by Sterling Publishing Company, 1999.  128 pages.

I rate it ... very good!

3.7/5.0

See my post about book reviews for details about my review criteria and biases.

Great Paper Quilling starts with a brief section for beginners - a tutorial on how to quill and an explanation of necessary tools and supplies.  Then the book quickly gets into the projects, designed by a host of different quillers.  The projects include: frames, motifs, flowers, insects, jewelry, letters, miniatures, snowflakes and more.  There is no gallery at the end.

What I liked:
The book is well produced with lots of nice color images.  The projects are well presented (and given the nice pictures, the projects are, for the most part, easy to follow.)  There is something for everyone here.  Since a number of designers are represented, the book does not get repetitious.  

What I liked less:
The tutorial section is quite small.  I can see a book like this opting out entirely, given this is supposed to be 'great' paper quilling, but if it is there, then I have a bias that a tutorial be substantial.  Some of the projects seem basic, again for a book of 'great' quilling, while others, like the quilled church, are quite large in scope.  There is no gallery at the end, and I expected to see more quilling inspiration there.  Because the quilling is created by different designers, the quality and nature of the quilling isn't consistent throughout the book.  Overall, I don't think the book quite hits its intended mark of 'great' quilling.

I'm glad to have the book on my shelf, and do flip through for inspiration now and then.  I think it is best suited for moderately experienced quillers, not beginners, since the tutorial is so short.  Advanced quillers may find the designs too basic.  Current prices - new at about $15, the book may be just a tad pricey, but used for less than $4 is a steal.   

Saturday, September 26, 2015

Poinsettia Flower Ornament Revisited

As you know I posted the directions for my Poinsettia Flower Ornament here on the blog a few weeks ago.  (I had also created directions for my Halloween Sampler, and posted that up at Craftsy for a fee.)  It occurred to me that the directions for the simple poinsettia flower might be a nice thing to post for free, so that's what I did.

I am astonished to say that the Poinsettia Flower Instructions have been downloaded from Craftsy more than a hundred times already!  This means a couple of things to me - people really like free patterns (of course) but also, that there is a demand for really simple quilling patterns.  I am surprised, actually, but it has been ages since I was a beginner at quilling.  I'm having a little trouble imagining what it is like ... especially since there was no internet nor computers when I first started.  I learned all my material from books or from patterns I purchased.

These days, of course people are turning to the internet before anything else.  Why buy a potentially expensive book when you can download patterns for free, and get all your instructions on free videos from various sites?  Seems like a smart way to start and see if you like a craft before making more of an investment in time and money.

So I'll be thinking of ways to post other, small, free patterns and hope they are as useful and popular as the poinsettia!  I wish I had written down the directions for my candy cane when I made it.  I'll have to be more thorough when I make new pieces - someone else might want to make them, too!

Thursday, September 24, 2015

Halloween Sampler - Projects #2 and #3

Here is the next installment of the Halloween Sampler Instructions!  This covers projects 2 and 3 (out of nine).  I've already posted the general instructions, the mat board cutting instructions, as well as project #1 and a bonus project!

First post -  Halloween Sampler
Second post - General Instructions and Mat board
Third post - Bonus Project and Project #1

And remember, if you want to download all the instructions right now in one go, then head over to Craftsy where I have them posted for $3.99.

Project #2: Frightening Ghost

Materials:
- light grey, 9 strips at 6” long (body)
- light grey, 2 strips at 4” long (body)
- light grey, 1 strip at 10” long (head)
- light grey, 2 strips at 8” long (arms)
- black, 2 strips at 2” long (eyes) – 1/16” narrow strip
- black, 1 strip at 4” long (mouth) – 1/16” narrow strip
- grey, 4 strips at 6” long (fog)

Take the nine strips of light grey 6” long and make long diamond shapes. Take the two strips of light grey at 4” long and make two teardrops. Also make teardrops out of the two 8” long light grey strips, curving the teardrops slightly at the ends. Make another teardrop from the 10” long light grey strip. Glue these together as shown to form the ghost.

For the face, create three circles from the narrow black strips, and use the larger circle for the mouth. Glue these onto the ghost.

For the ‘fog’ use 4 strips of a slightly darker color of grey. Make very long “S” coils from each of these. Glue two of the “S” shapes together as shown for the lower border, and two other “S” shapes together for the side border. Glue these together where they touch.

The ‘fog’ is of course optional. If you are choosing to put your projects into the sampler, then you may want the fog to help ‘frame’ the projects. Each of the four projects in the corners of the mat board have an element that helps to frame them.

Glue these pieces into the mat board, right column bottom square.

Project #3: Jack-O-Lantern

Materials:
Jack-o-Lantern
- orange, 1 strip at 14” (large pumpkin)
- orange, 2 strips at 16” (large pumpkin)
- orange, 2 strips at 18” (large pumpkin)
- light brown, 1 strip at 4” (large stem)
- olive green, 1 strip at 3” (leaf)
- olive green, 1 strip at 2” (corkscrew vine)
- black, 2 strips at 4” long (eyes)
- black, 1 strip at 3” long (nose)
- black, 3 strips at 2.5” long (mouth)
Border
- olive green, 2 strips 3” (leaves)
- olive green, 2 strips at 4” (leaves)
- olive green, 2 strips at 4” (vines)
- light brown, 1 strip at 2” (small stem)
- olive green, 1 strip at 1” (corkscrew vine)
- orange, 1 strip at 4” (small pumpkin)

The pumpkin is made of bright orange, five strips, one at 14", two at 16", and two at 18". Take the 14” strip and make an ‘eye’ shape. Take the other long orange strips and make crescent shapes. Glue the shorter crescents to the eye shape, and then glue the longer crescents to form the outside of the pumpkin, as shown.

The stem is light brown at 4" long, formed into an asymmetrical square shape. Make the leaf shape from the olive green 3" strip. Use a toothpick or quilling tool to help form the corkscrew vine from the 2" of olive green. The face is made of black strips, all triangles, with eyes of 4" long, nose 3", and three teeth at 2.5" each. Glue together as shown.

The vines are long “S” shapes, each 4" of olive green. Make all four leaves, and glue the smaller 3” leaves closer to the middle of the vines. Glue the longer 4” leaves to the ends of the vines.

The small pumpkin is a somewhat flattened circle made from one 4" bright orange, strip. It has a tiny square stem made from the 2" light brown strip, and a coil of 1" olive green.

As you see from the photo, the ‘vines’ and the small pumpkin are not attached, but are separately glued to the white background. The jack-o-lantern is framed nicely by the vines. Glue these pieces into the left column, into the square at the bottom left corner.

Thursday, September 17, 2015

Halloween Sampler - First Projects

As promised, I'm going to post the instructions for my Quilled Halloween Sampler here on the blog.  This is the third post; time to get into the projects!

First post -  Halloween Sampler
Second post - General Instructions and Mat board

And remember, if you want to download all the instructions right now in one go, then head over to Craftsy where I have them posted for $3.99.


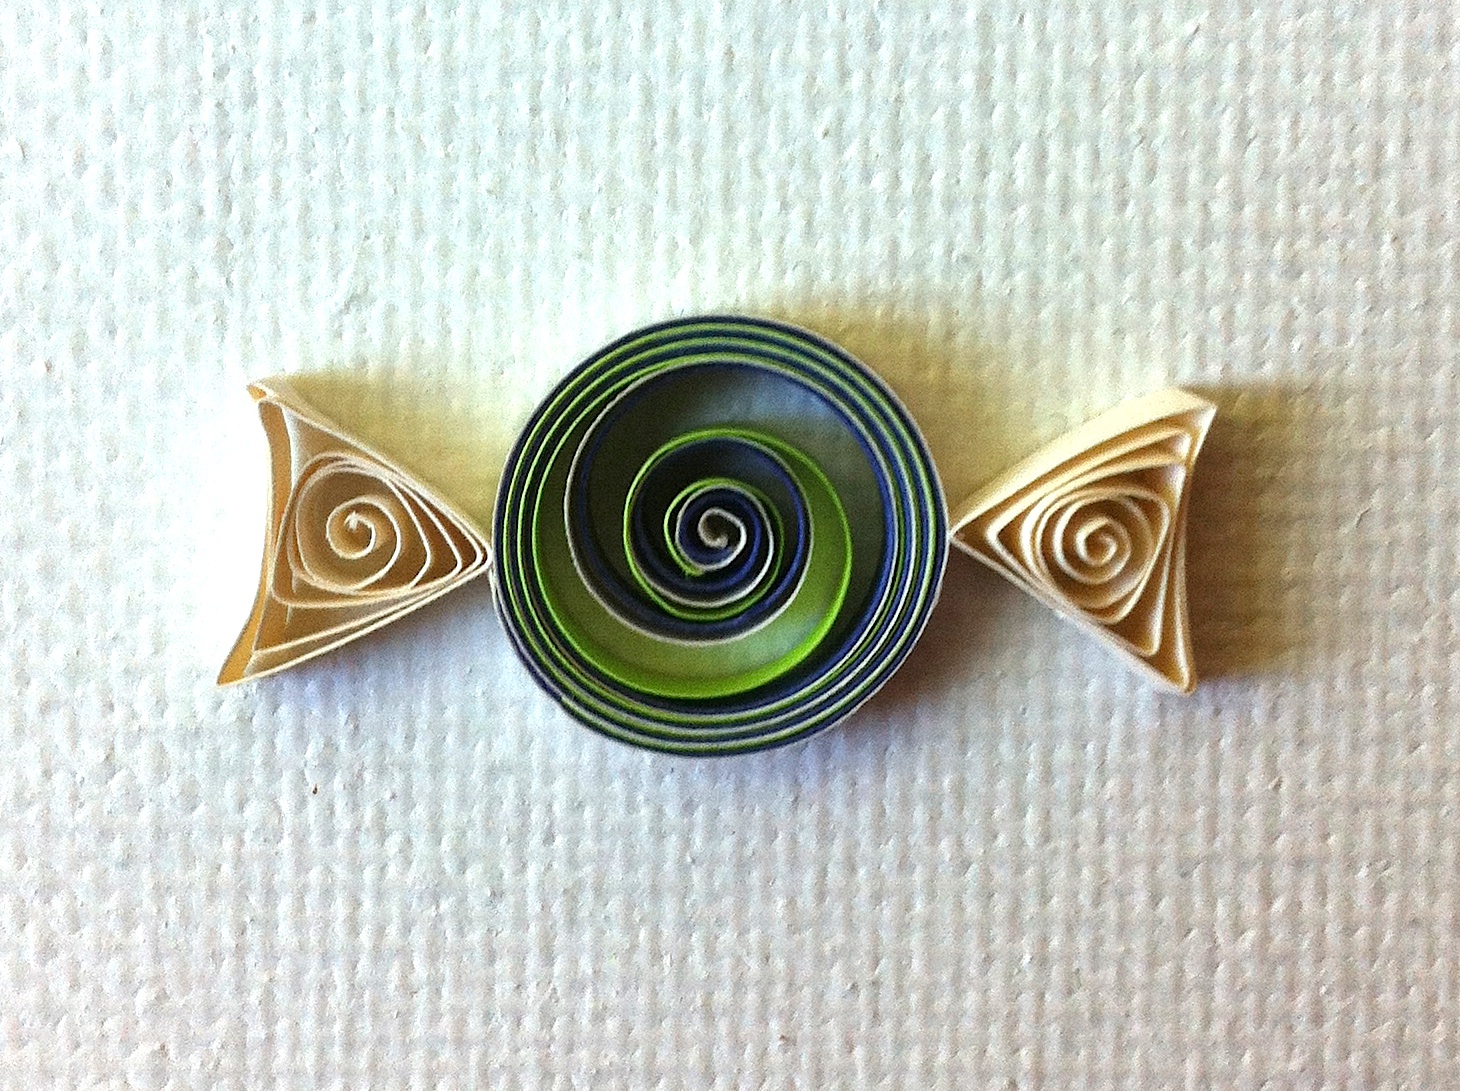
BONUS Project:  Quilled Candy in Wrappers

Materials:
- white, 6 strips at 4” long (wrapper)
- white, 3 strips at 8” long (candy)
- bright yellow, 1 strip at 8” long (candy)
- light red, 1 strip at 8” long (candy)
- purple, 1 strip at 8” long (candy)
- orange, 1 strip at 8” long (candy)
- black, 1 strip at 8” long (candy)


Here is an easy project to start off that’s not shown in the sampler – quilled candy in ‘wrappers.’  Start by stacking (right on top of each other, NOT end to end) the red, yellow, and white strips all at once.  The white strip should be on the ‘bottom.”  Roll the three strips up all at the same time.  The three colors swirl together as you roll them.  Make sure the white ends up on the ‘outside.’  Form a circle (the colored strips might need to be trimmed to hide them under the white.) 

Make two triangles with 4" of white paper each.  Curve one side.  Glue these with the curved side out, to either end of the circle.  Repeat with a stack of green/purple/white, and then a stack of orange/black/white.

Project #1:  Flying Bat

Materials:
- black, 8 strips at 6” long (wings)
- black, 1 strip at 9” long (body)
- black, 2 strips at 2” long (ears)
- black, 3 strips – from ¾” long to 1.5” long (small bats)
- bright yellow, 1 strip at 10” long (moon)

First make eight circles with the 6" black strips.  Form these into triangles, but curve one side of each.  Glue these together as shown to form two wings. (Each wing has three triangles pointed ‘up’ and one pointed ‘down’.) 

For the body, take a 9" black strip and make a teardrop.  Take 2" black strips and form them into long triangles for the ears of the bat.  Glue the pieces together. 
Take three black strips that are from 3/4" to 1.5" and make "M" shapes (other bats).  Use a 10" strip of bright yellow in the form of a crescent to serve as the Moon.

Glue these pieces into the mat board – right side middle square.

Image Credit - My pix of my quilling, my designs

Thursday, September 10, 2015

Quilled Halloween Sampler

I've been considering making a sampler of quilled Halloween projects for a long time.  I love Halloween, and often use small designs and motifs on place cards, tags, ornaments, wall art, and more.  I've never bothered to actually write down any of my designs before - so they come out differently every year, AND I have to spend extra time and paper trying to figure out what I did the last time around :)

So this year I spent the time and effort to record all my paper widths, lengths, and shapes as I worked.  I also took a few pictures of the intermediate stages as I went along.  I realized when I was close to finished that I might not be the only person who would like to use the directions.  So to make up some of the resources I used, and to cover some of the time (it took a loooong time to write this up), I decided to post all the instructions for a fee over at Craftsy.  So if you are in immediate need of some ideas for Halloween, look no further!  You can download all 16 pages of Halloween packed PDF for $3.99.

OR if you can wait, and don't have the extra $$, then keep your eyes here on the blog.  I'm going to post all the instructions in pieces right here between now and Halloween!

Here's the blurb from over at Craftsy:

The Quilled Halloween Sampler Instructions will tell you how to make nine different small Halloween themed projects (plus a bonus project!). The 16 pages are packed with pictures and ample details of paper quilling for you to recreate the sampler, or use it to come up with your own scary ideas!

These spooky designs can be used together to form a framed Halloween sampler group, or they can be used separately on greeting cards, gift tags, place settings, ornaments, wall art, or in whatever way suits your fancy! You can be creative and detour from the exact directions whenever it suits you and your project needs.

Some of the projects are very quick, while others are a little more involved, so you can fit the projects to the time you have available. Most of the designs are suitable for someone who knows the basics of paper quilling (beginner), while a few others are suitable for an intermediate level of quiller.

Most of the designs and motifs will be familiar, like bats and pumpkins, while others will be more unusual, like vampire fangs and skeleton keys. Let your creepy side out and enjoy some Halloween fun with the Quilled Halloween Sampler!

Monday, September 7, 2015

Book Review: Quilled Borders and Motifs

Quilled Borders & Motifs by Judy Cardinal.  Published by Search Press, 2008.  48 pages.

I rate it ... good!

3.2/5.0

See my post about book reviews for details about my review criteria and biases.

This is a sturdy little (48 page) quilling book that introduces a host of small designs in many themes (i.e. baby, wedding, holiday) for use in a variety of situations (i.e. cards, frames, ornaments).  I do not have a long review for this book - regrettably, as I'll note later, the publisher made a bad decision in reproducing much of the content within another book.

What I liked:
The huge variety of little projects and designs that can be used alone or together to make wall art, greeting cards, frames for invitations and announcements, and so much more.  I think this would be a good book to show to children to get their ideas flowing.

What I liked less:
As noted, the publisher made a bad decision (in my opinion) and included ALL of the motif section inside of another book (Beautiful Quilling Step-By-Step, which I'll review another time.  It has material from several books, in fact.)  This decision by Search Press makes me nervous when looking at any of their books.  I have to ask myself, "Do I already own this in another form?".  The work is reprinted exactly, page for page, materially damaging the usefulness of both books.  It's a shame since it robs each book of originality and usefulness.  Another issue with the book is the uncertain quality of the quilling - for example, the quilled heart within the tutorial on page 14 shows uneven tension (visible in several of the projects in the book, as well.)  The book has few actual patterns for the designs, making more difficult for beginners, and a bit less intuitive, I think.

As a collector of quilling books, I am happy to have it in my collection.  But for the current going price of $10 or so, I'd probably go for the larger Beautiful Quilling book instead of this one, were I choosing between the two.

Saturday, September 5, 2015

Quilled Holiday Ornaments for the Charity Project

In the end I quilled three ornaments for the "Quilled Ornament Charity Project" (even though when I made the poinsettia, I said I'd only make two).  I knew from the beginning that I didn't want to make snowflakes, since I am assuming Carie is going to get sent a ton of snowflakes.  So I concentrated on other designs that I thought would look good in a green tree.

The candy cane idea came to me as I was considering how I could use white paper for something other than snow.  I made the entire candy cane out of white, and then for the stripes, I just wound one long red strip around the piece and glued the ends down.  To add some interest, I embellished with a sprig of holly.  The star is made only from triangles, circles and eye shapes in white and yellow.  Hopefully it doesn't look too much like a snowflake :)  I didn't want to make it solid yellow, though, since I thought that would been a little boring to look at ...

So off they go to their new home, to be placed on a tree and auctioned off for charity.  Remember that the deadline for ornaments is October 15!  There is still plenty of time to quill a piece or two and send it off.  Shipping is cheap because they hardly weigh anything at all :)

Image Credit:  My pic of my own ornaments.  Designed by me.

Thursday, August 27, 2015

Artist Interview: EverAfter Artisanry

Today's interview is with the talented force behind EverAfter Artisanry.  These lovely wire and bead flowers are her work, and she has agreed to share her projects, ideas, history, and more! 

When did you get interested in wire/beading art, and how did you learn? (books, youtube, other artists, etc.)

I was first interested in the aesthetic of wire-wrapped jewelry a very long time ago, probably over a decade ago, but it wasn't until the last few years that I actually thought I could attempt to do it myself. Probably I started first working with wire in a hobby way about three years ago. I would wrap large crystals with wire to turn them into Christmas ornaments and give them to friends as gifts. Around a similar time I was separately learning some beading techniques, just using plastic beads and elastic cords, as there was a stretch of time when I was going to raves and making what they call 'kandi', which is the word for the large colourful bracelets that a lot of kids wear at those parties. I learned some basic beading techniques from my friends at what we called 'kandi sessions', where we would go to someones house, sit around, and make those bracelets. At some point along the way I became interested in beaded embroidery, to embellish fabrics. Two years ago was the first time online that I saw a picture of a 3d beaded flower. I was looking for 2d flower patterns/techniques to bead flat onto fabric, but seeing these 3d ones fascinated me. I did a lot of learning through looking around for free articles on the web, and from watching youtube videos. When I am developing my own patterns for beaded flowers I will hunt around on the internet for articles regarding how to make those kins of flowers out of paper, and then adapt it to make the same shapes from my wire. Sitting down and just practicing has been essential to learning. Finding wire that is thin enough to get the seed beads onto, and strong enough to hold shape, using different gauges for different purposes, has been a trick of experimentation. I made my first bouquet at the end of last year/beginning of this year. I have made eight bouquets in total now, and I learn more each time.

What is your favorite project that you have made?

I would say that this piece is my favourite one, as it stands:  everafterdesigns.deviantart.co…  I am one of those artists that tends to dislike their older work as mistakes become more apparent or I prefer my newer techniques, and, I think in many ways some of my newer pieces are better than this one, but, this is my favourite. I spent a good bit of time designing it through sketches after looking at calla lilly bouquets on pinterest, I was throughtful about my choice of colours as well. In this one, I also taught myself how to make calla lillies without a pattern, and I just have not done anything else on this scale. Its so large!

What do you like best about wire and beading art?

I think its a very expressive medium, though to be honest most forms of art have a wide range of expressive capacity. Honestly, the thing that I like best about it might just be that I seem to have some talent and that I authentically think I am producing good and creative work. I've messed around with other mediums, but, I think the stuff I'm doing at the moment is really bringing my skills together. I like a sense of accomplishing something.

Where do you get your ideas for new projects?

Well, I'll take inspiration at the moment by looking at bouquets using real flowers. There are a number of classic bouquet types, such as circle bouquets, cascading bouquets, even sheath bouquets. I have not made a sheath bouquet yet! I want to be able to create varied arrangements of flowers, arrangements in different sizes and different shapes, conveying different moods - so I'll find inspiration by trying to widen my portfolio, essentially. I also look into wedding trends, what flowers, colours, styles and shapes are popular. There is a website called Style Me Pretty that always posts the most beautiful floral designs, so, I find that very inspiring to look at.
www.stylemepretty.com/

What makes your projects different from other people's?

Well, in the scheme of things, there aren't actually all that many people who seem to make whole bouquets out of seed beads and wire, so, being in an area with so few artists working in the medium makes it easier to stand out, I think. I'm relatively new to this area, as I said earlier, I have only made eight bouquets - but I think my research into floral design helps me to create unique designs. Also I don't work from other peoples patterns, I develop my own. I don't do that by looking at other beaded versions of the flowers I am trying to produce, I'll do it by looking at the actual flowers themselves, and my looking into construction techniques for flowers in other mediums such as paper - to help me get realistic shapes. I think that kind of innovation might help me to stand out as well. At the moment I am really focusing on providing a wide range of colours/sizes and shapes, but into the future I think one thing that will help me stand out is I pay attention to fashion trends. I'm the sort of person who keeps up with couture runway designers, so, I think taking influence from couture catwalk trends will also help my work have a little something different.

How do you stay current with new techniques and trends in wire and beading?

To be completely honest, while I do produce good work (I feel) - in many ways I feel that I have a lot of 'mastering the basics' to go, when it comes to techniques. I'm not on the cutting edge of wire-work or beading techniques, not at all! I'm starting to get better and have subscribed to some mailing lists for beading websites, but this is an area I don't feel on top of, to be honest!

Do you have any special or long term goals for your art? A contest, or major project, or producing a certain number of type of pieces, or some such?

Well, I am an aspiring professional. The proper long term goal would be to sustain myself doing this, as my full time job. Shorter goals to get me to that point are going to include coming up with reproducible jewelry lines for sale. Also I've got some special projects lined up in the form of some planned styled photoshoots. I want to make matching jewelry and accessories for some of my bouquets, and have some photoshoots with models. One of these major projects involves making an embellished black veil, jewelry and bouquet for a gothic photoshoot. I'm going to incorporate swarovski crystal skulls into the bouquet, I think thats going to be something special.

Is there one aspect or technique about your art that you really want to learn?

I want to get much better at basic beadweaving techiques. In the future I also want to get into glass blowing and glass work, so that I can make my own beads, and so that I can incorporate my own glass flowers into my bouquets. I think that could be really special.

Where can people go to view/buy your art, and do you take commissions/do custom work?

I'm really only in the setup phase of turning this into a professional gig, and, I have not opened a shop yet or started selling my work yet. I want to come up with a jewelry collection before opening up some sort of shop. That said, I would absolutely love to work on custom bouquet projects, so if anyone is interested, then contacting me through facebook to arrange talking more would be fantastic.

My art can be viewed in the following spaces:

https://www.facebook.com/EverAfterArtisanry
http://everafterartisanry.tumblr.com/
http://www.everafterdesigns.deviantart.com

Many thanks to EverAfter Artisanry for agreeing to be interviewed!  If you'd like to be interviewed, leave a comment on this or another post!

Image Credit:  All images credit EverAfter Artisanry.

Sunday, August 16, 2015

The Quilling Archive - A Gallery of Quilling

Quilling inside of real seashells - made into ornaments.
I've done so much quilling - it's hard to keep track of who I gave it to, and where it is even in my own home.  But I've recently been struck with the idea that I want to document it all, so I've been rounding up quilling projects, old and new, and taking the best pictures I can.  I've been putting up the best of them at my newly created DeviantArt Gallery for quilling.

There is so much stuff - wall art, ornaments, miniatures, jewelry, and more.  You can see the evolution of my quilling through much of it, but since I started at the age of nine, by the time I was in high school I was pretty proficient.  Pieces like these shell ornaments, done when I was about fourteen, show solid technique and an eye for fun.  They even include tiny little pine cones.  I don't think I'd even imagine filling seashells and turning them into ornaments anymore, which is a shame.  :)   I don't even recall where I got the idea in the first place.

They are a bit beat up, with a few pieces missing, and a touch faded.  But not much, considering decades of sunlight, humidity, and moving from place to place.  I'll chalk that up to using a good acrylic sealant, and maybe using a bit too much glue.  I've always used a bit too much glue - one of those technique problems I have ...

How about you?  What was your first quilling project?  How do you preserve your quilling for the ages?

Image Credit - My picture of my own quilling, designed by me.

Saturday, August 8, 2015

Quilled Poinsettia Flower Ornament

As I noted in my last post, there is a need for quilled Christmas tree ornaments for a "Quilled Ornament Charity Project."  Click the link for details about the project, and to see if you might be interested in participating!

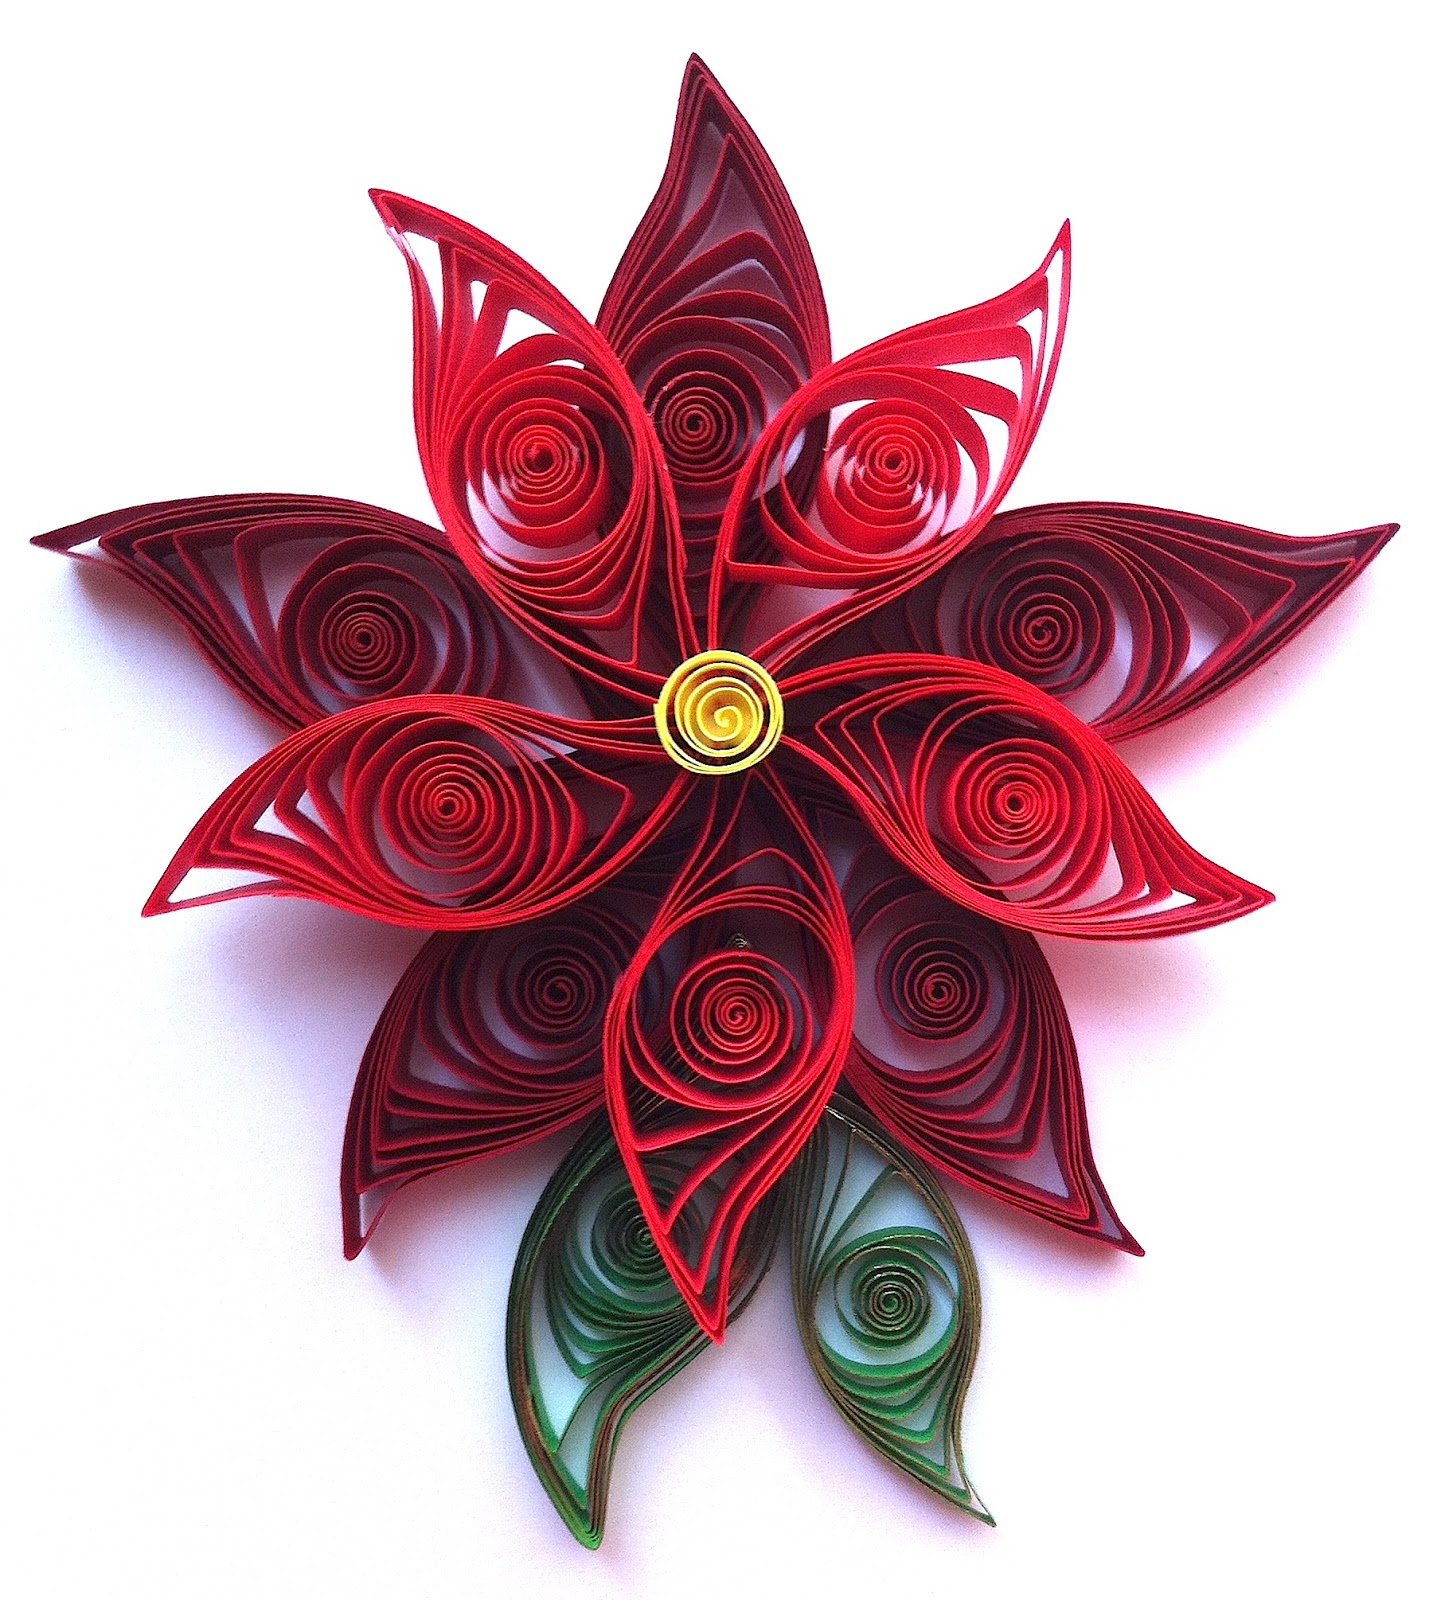
I have decided to make two ornaments for the project.  The first is this quilled poinsettia flower ornament.  It is a simple design, but it looks really lovely now that it is all finished.  I thought I'd present a tutorial here of what I did, so anyone could make one.  Although I've done plenty of live presentations and workshops, this is the first written tutorial I've really done for quilling, so here it goes.

Here's what you'll need ...
  • Five full strips of dark red quilling paper, 1/4 of an inch wide.  
  • Five full strips of light red quilling paper, also 1/4 of an inch wide.  
  • One bright yellow strip, 4 inches long and 1/8 of an inch wide.  
  • One full strip of green with gold edging, 1/8 inch wide, and another half of a strip of the same color.
  • Glue, I use a good quality white craft glue.
  • Ideally, a clear acrylic spray to finish the ornament 
Roll the dark red strips and form them into 'leaf' shapes.  Glue the ends of the petals together to form a five-petaled flower, as shown.  Roll the light red strips and also make 'leaf' shapes.  Glue these together to form another five-petaled flower.

Now, you can see my light red flower is a bit smaller than the dark red flower.  This was intentional.  My dark red paper is very heavy, making a larger coil when it unwinds, and my light red paper is light, rolling tightly and not unwinding so much.  So even though the strips are the same length, the petals for the light red flower layer are somewhat smaller.  If you are dealing with paper that is the same weight for each color, you'll want to take some of the length off of your light red strips to achieve this effect.  I've placed a quarter in the image to give a sense of scale, both so you can see the difference in sizes a little better, and so you can see the size of the whole design.  It's more than four inches across at this point.

After the two 'flowers' have dried, stack the light red, smaller layer on top of the larger dark red layer and glue them together, staggering the petals.  You might have to be clever with small dabs of glue here and there to ensure the design is sturdy enough to hang from a tree, but doesn't look like it has glue all over it.

Then roll the bright yellow strip into a simple open circle quill and glue that to the center of the design.  This was where I'd originally intended to stop.  I added a silver jump ring at the top so it could dangle from the tree.  But then I took another look and decided the piece needed a but more 'oomph.'  So I chose to put a pair of leaves on it.  Roll the two green/gold gilded strips and make leaf shapes, as shown.  One will be smaller than the other, of course, because the strips are not the same length.  You might need to be careful about gluing them.  I had to add extra glue to the backs (the not-gold side) to make sure that they didn't 'spring out' like, well, springs, anytime the design was bumped or dropped.  (I put it through a few tests ...)

Then I glued them between the bottom petals of the flower, keeping them flat on the work surface.  They added just the extra interest and 'bling' I was looking for.  Then I coated the design with about three light coats of clear acrylic sealer.  I use Krylon Gloss UV protective clear coating for most of my quilling.  I like the way it tends to enhance the colors while adding a bit of a sheen.  Excellent in this case, athough I use the 'matte' finish rather than the 'gloss' in some situations.

Finished!  It's about five inches from top to bottom, and has a nice sturdy feel to it.  I hope it shows up well on a six foot tree, and has the durability to survive the whole auctioning process :)

Image Credit - My photos of my new poinsettia flower ornament!

Help with the Quilled Ornament Charity Project!

Carie Metcalf of Washington state is working on a quilling project for charity, and needs a bit of help from all the quillers she can reach.  She is creating a decorated Christmas tree for her local "Festival of Trees" with the theme "Quilling Around the World."  She needs 250 quilled ornaments of any kind, from everywhere, to put on the tree by October 15, 2015.  After the six-foot-tall tree is fully decorated, it will be auctioned off to support a hospital charity.

She particularly needs help from international quillers, but will gratefully accept a quilled ornament from anywhere.  For details on what she needs, and where and how to prepare and mail your quilling, email Carie at Carecat26 (at) gmail.com.  If you are a member of the North American Quilling Guild, you can also find details inside the Spring 2015 issue.

If you'd like to help out, but have never quilled before, you can check out this tutorial at Instructables.com, which shows how to make a simple quilled snowflake.  It even includes how to cut up a sheet of paper if you don't have access to special quilling paper!  Give it a try, and you may find you really love to quill, just like the rest of us :)  I'm also going to post the instructions for my own quilled Poinsettia Ornament that I will be sending to Carie, so keep your eyes open for that.

Image Credit:  Quilling Snowflake Decorations at Instructables.com